Suppress the CoreDump Warning
This will be another short one. After some time, I managed to get another host
After a successful update and installation of the ESXi server we want to have a couple VMs. Due to the fact that the Management Interface is connected to the IP which got assigned during the ordering process we need to take care about outbound and inbound connections. The general idea looks as follows:

(Don't beat me. It might not be optimal, but it helped my understanding)
That exposes one thing which I dislike. In the default configuration is the Management Portgroup and therefore the ESXi Management Interface directly reachable from the Internet. That is why I included the Hetzner Incoming Firewall. The general idea is to lock it down as much as possible. Partly because Security, partly because I'm lazy, and I'm living in Germany. That will tell the dear reader that the internet here is kind of bad. On every level. Be it Carrier Grade NAT, be it a bad connection, you name it, we have it. To access the host before we have something like a VPN for the environment we should have at least a firewall in place.
The Hetzner Firewall can take care about that. Because the IP is changing from where I want to access the host, we need to update the firewall each time. To automate this a little bit, I took a look into the documentation of Hetzner. Before we can start, we need to prepare a few things:
One could implement it in various means, for this little endeavour I choose to dip my toes into Python. Why? I can't tell you exactly what drove this, but I heard a few good things about the Module Requests which should - in theory - make the process smooth and easy. Let's go through the different steps one by one. At the end you'll find a Github Repo with the current state. It might happen that I'll enhance it.
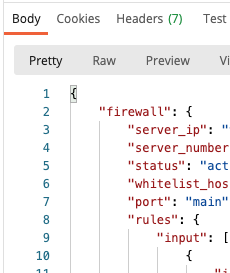
This is pretty straight forward. In the Hetzner Robot you need to access your settings (via the "Hamburger" Menu in the top right corner). You'll find it right in the middle. Specify a strong password and let your password manager take care of it. You're not using one? Okay. I'll wait. You got one? Good. After setting the password you'll get the corresponding username via mail. To test if everything is working properly, one could use Postman. Or curl. I used Postman, because it handles a lot of things in a nice manner, you can organize your requests and more importantly, you can directly export your requests as Code Stubs. In every possible language. To test the access, I used the following request:

It uses the configured BasicAuth which sits on the "Collection" level. If everything works according to plan, you'll get a nice JSON back.
Good. Let's keep it here, and proceed with the next bit.
This one can be solved via different means. I stumbled across https://www.ipify.org/ - and you'll directly get the cURL command to use. Basically use https://api.ipify.org and get a plain text answer with your current IP. Way too easy, right? Good. Now the hard part.
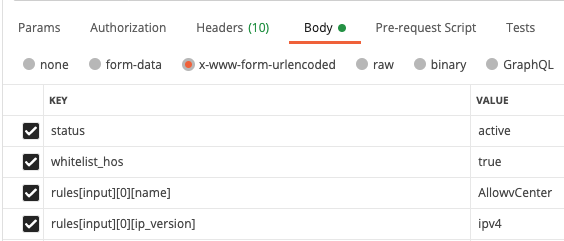
This is where it gets really tricky. As per documentation (link) You need to include the rules as a very interesting data structure. If you enter it in Postman, one can successful get the request through. It looks like this:
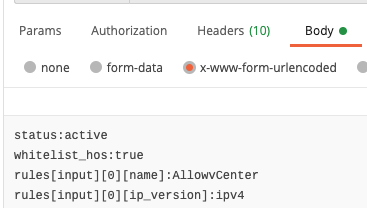
In the bulk edit mode it looks like this:
Looking at the code examples, it utilizes the "--data-urlencode" from cURL. In every other language it is necessary to use some advanced processing to get it done. Remember that I wanted to leverage Requests? Turns out that on the one hand side you need to process the JSON (or the YAML for that matter) to match this Dict-List-Dict monstrosity and on the other hand it simply does not make sense to me why one would choose this kind of payload.
So I'll share my progress with you shortly on Github - as soon as I've figured out a way to process the data in the way it needs to be.
Long story short: Leveraging the Hetzner Incoming Firewall will successfully handle the traffic to your precious ESXi Management Interface. Next up? A router VM.